
Many times in the renovation industry, you only see the drab “before” pictures and the fabulous “after” photos. Rarely do you get to see the process of how those beautiful after photos came to be. What’s the secret to a good renovation? The part that is rarely seen–sound construction and a solid plan.
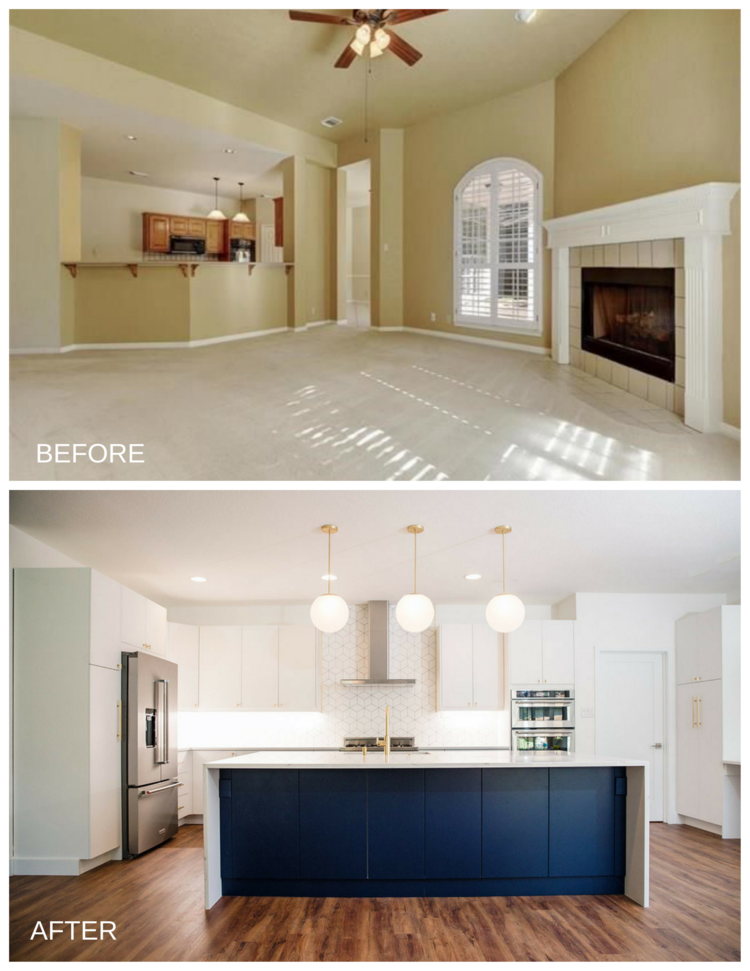
Today we want to give you a more in-depth peek into the process of a kitchen renovation right here in Austin, TX. Our client had a load-bearing wall that she wanted to remove in the center of her kitchen. This wall made the kitchen feel closed up, dark and isolated. Her goal, like most of our goals when renovating, was to open up the space and make it lighter and brighter. This was a permitted project and one that we brought an engineer in to consult with us on the load-bearing wall.
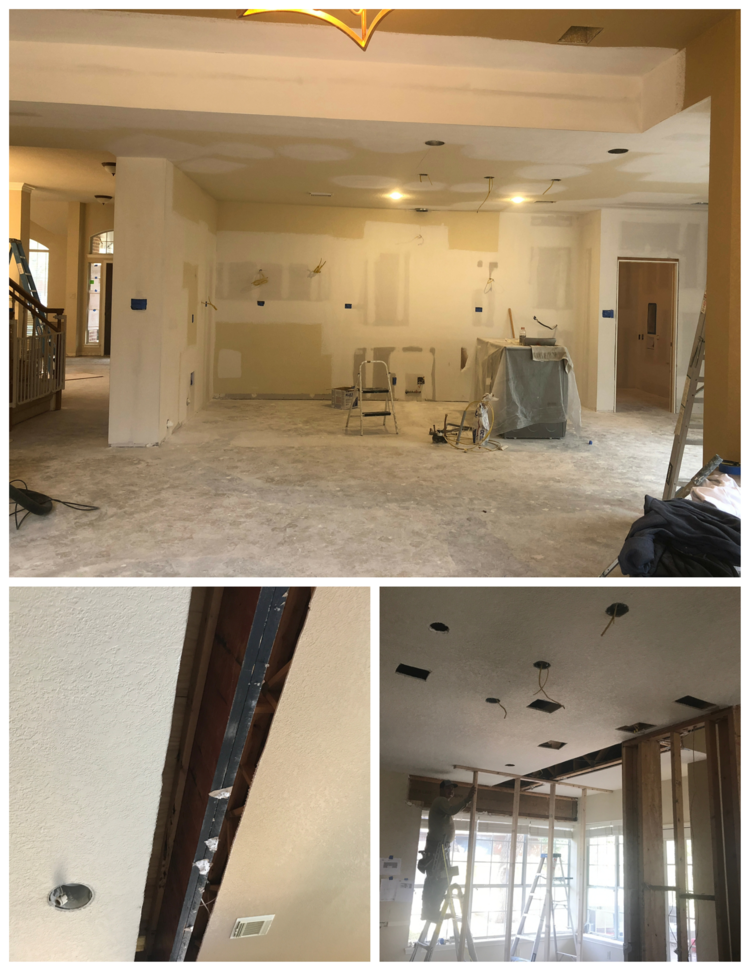
(ABOVE) FULL GUT OF THE KITCHEN TO CREATE A BLANK CANVAS. (LEFT & RIGHT) INSTALLATION OF A BEAM IN PLACE OF THE LOAD BEARING WALL. AFTER INSTALLATION OF THIS BEAM, THE CEILING IS DRYWALLED, TAPED, FLOATED, AND TEXTURED–GOOD AS NEW!
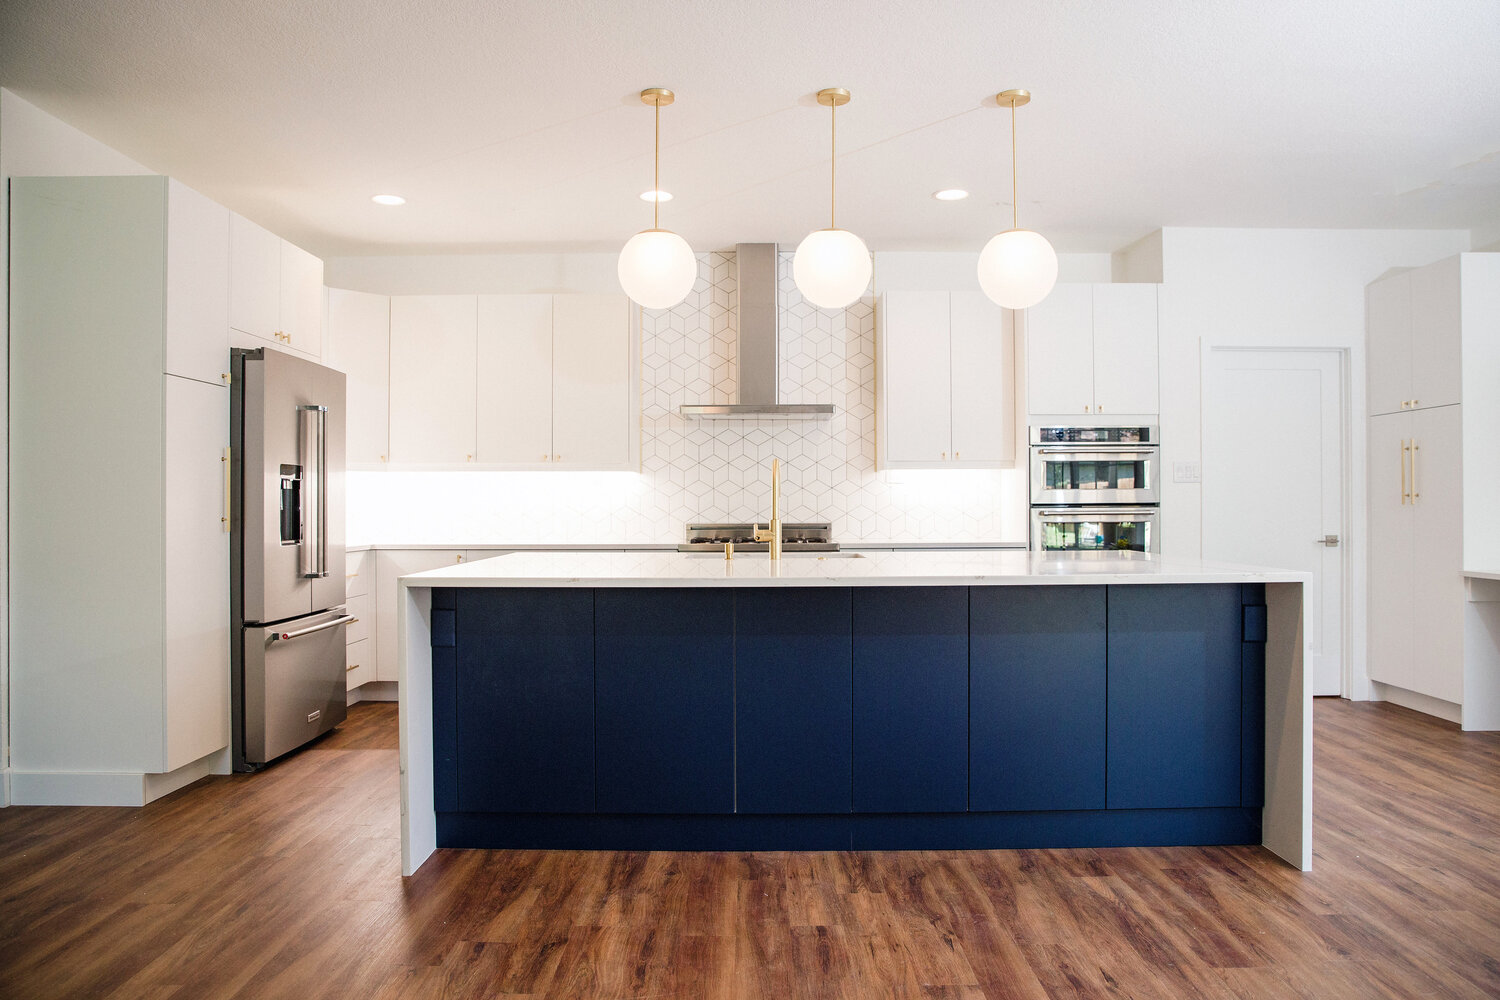
After the space had been opened up, we had a large template with which to plan and execute a new kitchen space. We installed a large, waterfall, quartz island with a seamless countertop, and added a desk/study area and much more kitchen storage. In order to accomplish a bigger kitchen plus a study nook, we took space from the garage and laundry area and elongated the kitchen. The existing garage was long enough that the laundry room could be pushed back and yet both cars can still fit in the garage.
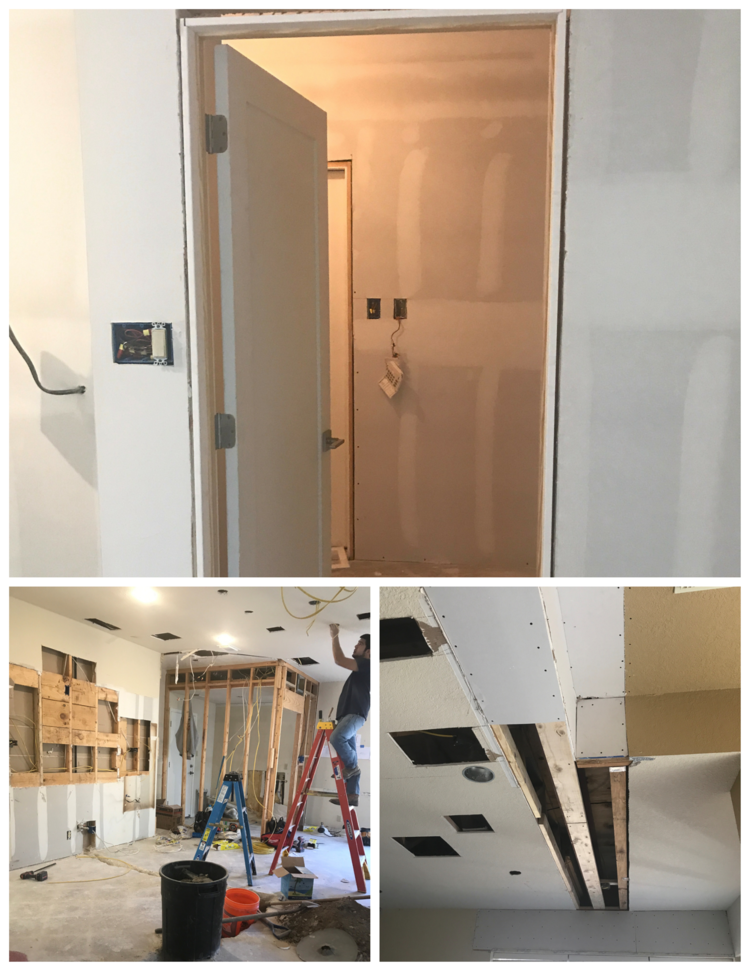
(ABOVE) EXTENDING THE LAUNDRY ROOM INTO THE GARAGE; (LEFT) INSTALLING THE ELECTRICAL; (RIGHT) DRY WALL GOING BACK UP OVER THE BEAM INSTALLED IN THE KITCHEN.
It was a hard couple of months for this family to live without a proper kitchen. However, in the end, they ended up with a beautiful space that adds great value to the design and to the value of their home. We love helping clients see their visions turn into a reality!
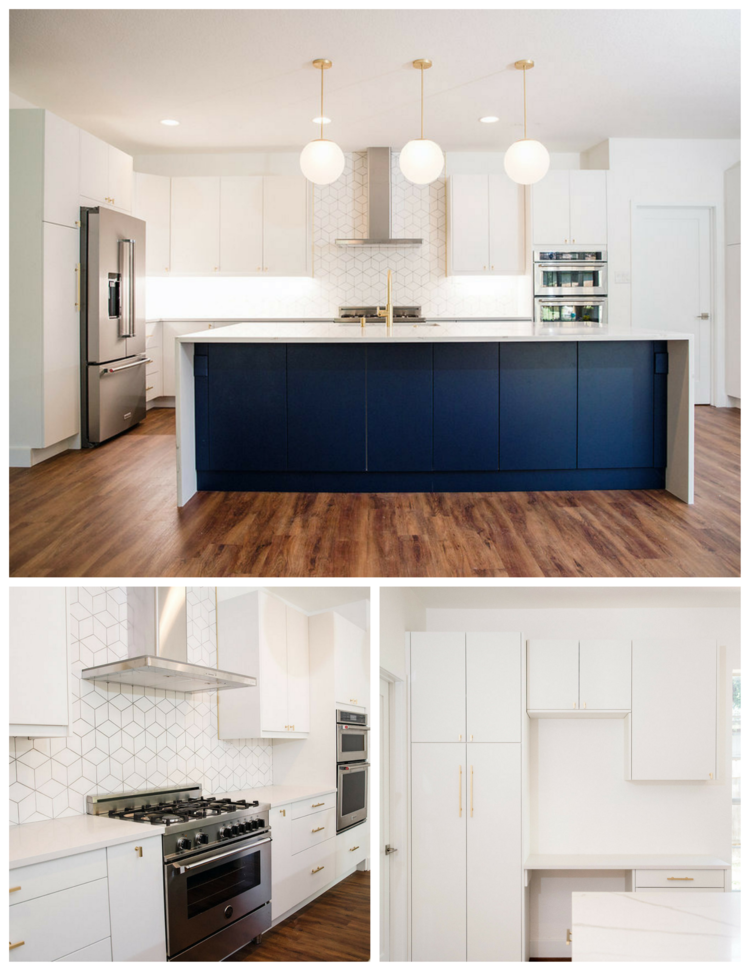
(ABOVE) THREE PENDANT LIGHTS COMPLETE THE LOOK ABOVE THIS SPACIOUS ISLAND. (LEFT) A DOUBLE OVEN, SLIDE IN, AND UPGRADED STOVETOP MAKE THIS KITCHEN PRIME FOR SOME SERIOUS COOKING. (RIGHT) THE KITCHEN WAS EXTENDED INTO THE EXISTING LAUNDRY AREA TO CREATE ROOM FOR EXTRA CABINET STORAGE AND A STUDY NOOK.
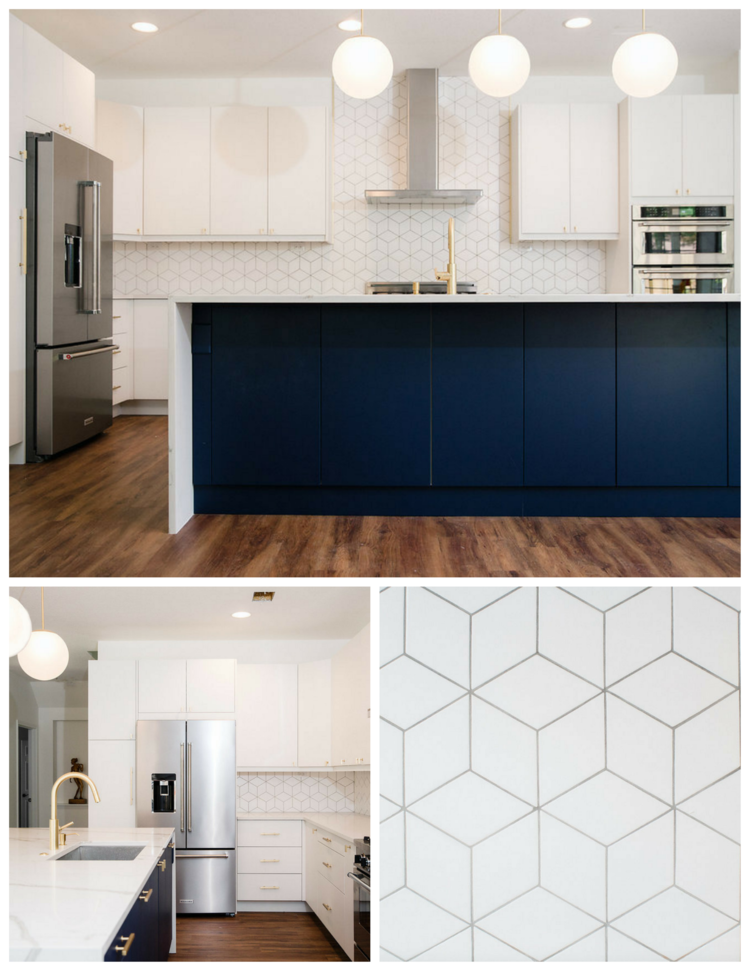
IN ADDITION TO THE WATERFALL COUNTERTOP AND BLUE AND WHITE CABINETRY, THIS KITCHEN FEATURES NEWPORT BRASS FIXTURES, STAINLESS STEEL APPLIANCES, AND DIAMOND-SHAPED, FIRE CLAY TILES INSTALLED TO CREATE A CUBE PATTERNED BACKSPLASH.
Do you have a room in your house that feels closed off that you would like to open up? Have you ever wondered if a wall could be removed or is weight-bearing? Schedule a walk-through with us today. We can help answer your questions and get you started on your next home renovation! Let’s get started!